

PrestaShop Plugin
Show and place the notice in PrestaShop
Last updated 18 November 2026
In short
The notice on the legal guarantee is switched on after installation. On the Settings tab you choose under Places where it appears: product page, shopping cart, checkout and order confirmation. Each place corresponds to a hook of your theme.
Switch on
On the Settings tab you find Show the notice on the legal guarantee. Save with Save settings.
Places and hooks
| Place | Hook |
|---|---|
| Product page | displayProductAdditionalInfo |
| Shopping cart | displayShoppingCartFooter |
| Checkout (summary and before the order button) | displayPaymentTop |
| Order confirmation page and e-mail | displayOrderConfirmation, plus the attachment to the order_conf mail |
The guide only checks product page and cart. Check checkout and order confirmation in your shop.
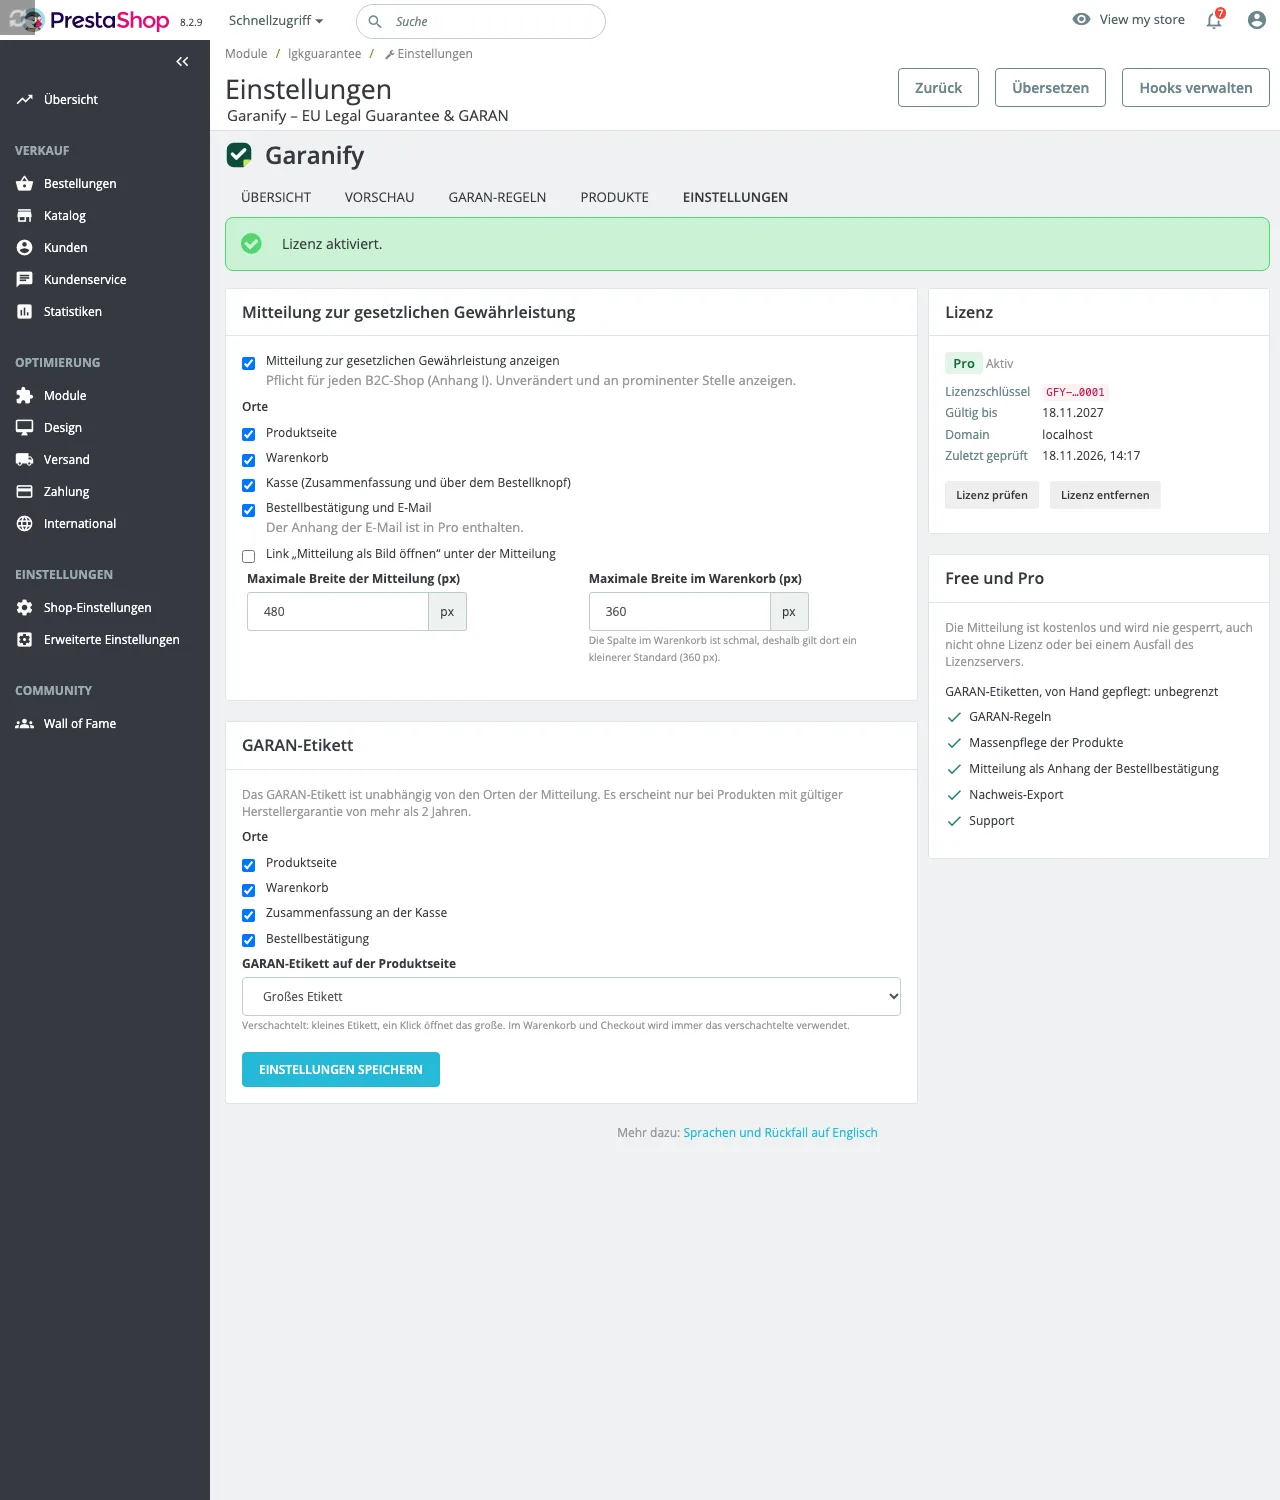
More options
- Link “Open notice as image” below the notice
- Maximum width of the notice (px), default 480
- Maximum width in the shopping cart (px), default 360, because the column there is narrow
Related questions
Does the notice have to appear in every place?
The regulation requires it before the contract is concluded, in a prominent manner. Product page and cart are common; checkout adds to them.
My theme does not output a hook. What now?
Add it to the template, for example the hook displayProductAdditionalInfo. Troubleshooting explains how.
What does “Register hook” do?
It attaches the module to the hook again if the connection was lost, for example after a theme change.
Sources
Was this article helpful?
What was missing? Send us a short note and we will add it to the article. Send feedback by email
Your choice is not stored or sent anywhere.
Thank you for your feedback. What was missing? Send us a short note and we will add it to the article. Send feedback by email